School’s out. You have no job, no internship and no major prospects for the summer. Things aren’t sounding too good for you. Instead of lounging around in your sweats, try your hand at a few DIY projects to keep yourself occupied and looking cool.
If you don’t already know, I’m a huge proponent of reusing what’s already in your closet or around the house, and DIYs are just the thing for that. Two major DIY staples that will keep you busy all summer are studs and beads. Stock up on those and you’re good to go. Here are a few quick ideas about what you can revamp in your wardrobe so that you’ll be ready to take on the summer.
Studs
With studs, the limit does not exist (yes, I intentionally inserted a Mean Girls reference). Go to your nearest craft store or scour the internet for these. They come in a variety of shapes and sizes, so don’t feel obligated to stick to the norm. With a bit of fabric glue you can pretty much restyle anything in your wardrobe for an edgier feel. As always, don’t go overboard with the studs. Moderation is your best friend.
If you’ve transformed an old pair of jeans into shorts, stud one of your back pockets or create a design on the front. If you have a ordinary pair of pointed flats add a few of your studs to the tips of them for that much needed wow factor. A favorite look of mine are statement collars. With this you can make a plain outfit better by studding the entire portion of the collar. In this case, it will be the statement piece to your outfit. Minimal jewelry required. Or if you’d simply like to add the finishing touches to an outfit place a few studs to the tips of the collar. Your summer is looking better already.
Bracelets
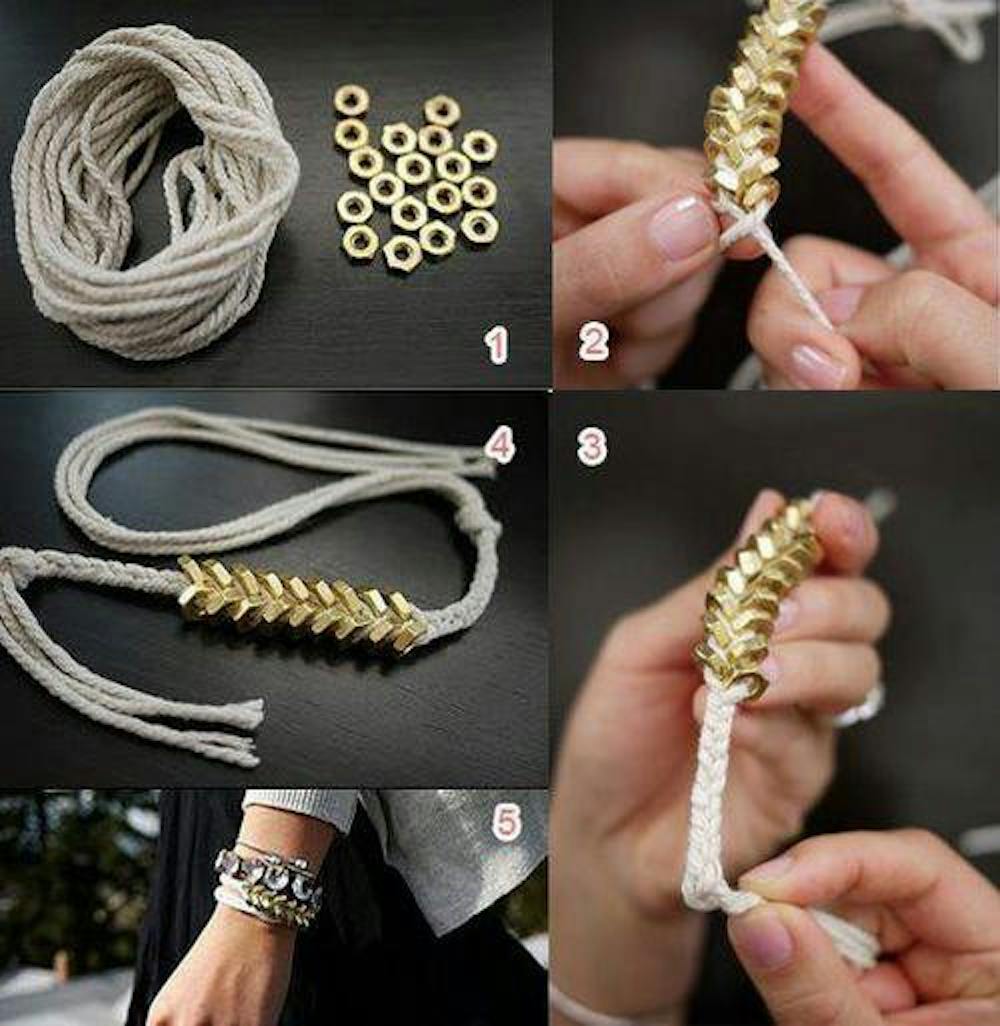
While your friends are off jet-setting, and hopefully picking up a few trinkets for you along the way, surprise them with some crafty gifts of your own. The friendship bracelet craze is back, and with some of the great designs I’ve seen, I’m definitely not mad about it. Just like when you were a kid, all you need is some string, cool beads (I’ve seen amazing designs made with seed beads and even hardware bolts), scissors and something to link it together like a button. These DIY bracelets can range from easy to hard depending on how intricate you want to get with the braiding of your string and beads. No matter how easy or difficult the bracelet is, they’re all pretty chic in their own way.
Check out this DIY blog for more specific instructions on bracelet making and don’t be afraid to browse around for more crazy ideas or even stray and create some of your own.


